Tuesday, May 2, 2017

5 Common Decorating Do Over


It happens to all of us.  Empty house, blank walls, barren floors.  Where do you start?  It can seem overwhelming.  I get it.  It's a lot.  And sometimes when we are daunted by the task of decorating a house, we make some mistakes.  Or, as I like to call them, decorating do overs.

Shortly after we moved into 5th and James I bought a rug for my living room that I was so excited for.   It was lovely subtle buttercream color background with a beautiful but not too feminine floral foreground.  But after it was delivered to my front door and rolled out in the space, it was all wrong.  I asked myself aloud, "Was it this YELLOW in the store?" The answer of course is,  "Duh.  Obvi.", and is an example of an opportunity for a decorating do over.

Putting a room together can be hard.  So I came up with a list of what I think are 5 common decoration do overs.  My point is not to be negative, but to hopefully help you avoid possibly making one of these.  And I will tell you this, I have definitely been guilty of each of these in my lifetime.

1. Rug is Too Small
Since I used a rug in my example, above I'll start here.  And this one is a biggie.  I know that rugs are a big financial investment and this is perhaps where we are led astray.   However, if your rug is too small, everything else will look off.  (I feel like I really could repeat myself there, but I'll spare you.) You could have the most gorgeous furniture on the planet in that room and if the rug is too small, it all looks wrong.  In general, for most living rooms, a rug should be at least 8X10.  So you can just rule anything smaller out in this room.  The rug should ground the space.  It should pull it all together.  A rug should set the stage for how the room is going to be used.  If you have a smaller rug that you love (maybe from a previous home or an antique) layer it on top of larger natural jute or sisal rug.

A rug does not need to fill an entire room, either.  It doesn't need to go all the way to the wall.  In general, allow at least a foot between the edge of the rug and the wall.  And up to even double that in larger rooms.  A rug should ground the conversation/sitting area by being amply large enough to fill the space.


Let me break that down for you.  All chairs and couches/ seating situations should have at least two legs on the rug.  You could do all four, as well.  But at least two should be on the rug.  So, don't put the couch down and then the chairs and then fill the space in-between with a rug.  That's a decorating do over.


2. Wall Color
A big bold color in a dining room or a small den or an office or powder room is awesome.  Add a little high gloss and it could literally bring me to my knees.  However, red on the walls in 8 rooms, room after room, is really not appealing.  But let's say that red is your favorite color.  What then?  I'd suggest a beautiful neutral color on the walls that bounces light around the room and then I'd add in lots of fun red in the accessories.  The red will still be the take away from the room.  It will just be less in your face and more pleasing to your eye.  And that way, when your favorite color becomes yellow, next year, all you have to do is switch out a few accessories.    

(wall color: barren plain by benjamin moore)
I really love color.  And my home is filled with lots of it.  But if you took everything out, all of the main spaces are neutral in color.  Our dining room is darker and there are several accent walls.  We were willing to take these color risks in the right proportions and in the right placement in the house.  If you are feeling nervous, you can not go wrong with neutral.  Better to have a beautiful light gray on the walls and lots of pops of color in art and accessories than to have a room that is screaming purple in your face.  

(wall color: calm by benjamin moore)
Additionally,  room color (including that in accessories and furnishings and art) should flow from one room to the next.   Especially if the rooms are visible from one to the next.  So when I walk in the front door and am greeted by a cool navy wall and pops of orange, as I walk into the next room and the next those same themes should come up.  That is how you make your home feel cohesive. You don't need to be too matchy.  Your home also shouldn't feel like it all was purchased from page 6 of the catalog.  But each room should feel like it belongs to the one before it.  Like they are partners.  They should compliment one another.  And PSA here- save the baby blue for the nursery.  I beg of you.  That's a decorating do over.   


3. Furniture in a Small Room is Too Small

My house is 100 years old and most of the original rooms are small.  So I understand that it can sometimes be challenging when designing a small room.  Just as it can sometimes be hard to fill a really large room.  Think about how you are going to use the room.  If it's a study, you'll want comfy chairs and easily accessible reading lights.  If it's an office you'll need a desk of ample size and somewhere for at least one other person to sit.  If it's a TV room you'll need seating accessible to the TV.  

If you have a small family room, it isn't the best room for a double wide sectional, but it also doesn't mean that you have to have a futon loveseat.  Maximize the furniture size in a small space to scale.  Make sure that you leave room for traffic flow and multiple seating options as well as a side table or two for drinks and magazines.  If everything is in scale with each other, your small room will not only function better but it will also feel bigger.


In a larger room, the key is to create zones.  Think about what each space will be used as?  Perhaps a conversation area over here.  A place to sit and watch the game over there.  Perhaps a reading nook.  Define these areas with rugs and furniture appropriate to those spaces.  And remember, with the furniture all grounded by that rug, it will feel pulled together and polished no matter the room size.  So leave the dorm furniture in your dorm.  That's definitely a decorating do over.  


4. Placing Everything Against the Wall
I can't tell you how often I see this. I think that it might be because people assume that it will make the room appear bigger.  People think that they will highlight all of their space by placing their furniture at the rooms perimeter.   In actuality, it does the opposite.  With everything against the wall, the conversation flow and intimacy of the room is totally lost.  To me, it almost feel like you are strangling the room.  But pushing everything right up against the walls you are depriving the room of its purpose.  Pulling the furniture away from the walls (even just a little bit) breaths life into a room.  It tells the eye that the furniture belongs there.  It invites you in.  It shows you that each piece has a purpose in this room.  It lets you know that this room has ample space for the furnishings you have placed in it.  And that they all belong together in this setting because they are all sharing this space easily.  


In general you want about 18 inches between the couch and the coffee table, and no less than 4 feet or no more than 10 feet between seating options for optimal conversation flow.  And remember, at least two furniture seat legs should be on the rug.  Have I mentioned that yet? That's how you avoid a decorating do over.  

5. Stopping After the Furniture is Placed
So you finally did it.  You got the perfect rug and the couch and the chairs and it's all sitting slightly away from the walls in a happy cozy way that invites and encourages conversation.  You found the perfect coffee table that hits right at the arm of the couch and you even have a lamp on that table.  Congratulations!  But don't. stop. there.   

So many people stop after they fill a room with the majors.  But what really makes a room, and eventually your home, are the little things.  The accessories, the personal touches.  These are the things that make a house a home, and more importantly they are the things that make your house feel like YOUR home.  So bring them in, layer them up and make it personal.  


Start with a cozy throw on the couch as well as throw pillows. Throw pillows should be fluffy and full and comfortable to lean against.  They should be layered on the couch.  You know sometimes when a couch comes with two sad looking pillows.  Please recover those poor guys and give them some friends.  Remember that pillows and throws can easily be changed out with the season or your tastes, so go for rich colors and beautiful textures.  

Add trinkets and books to the coffee table.  They are conversation starters.  Add light, and art and style to the mantle or bookshelves.  Every room should tell your story.  Leaving it empty, is a decorating do over.

That's all for my tips today, friends!  Thanks for reading!  I so appreciate that you do!  And remember, there's no such thing as a mistake.  Just an opportunity for a do over!

Wednesday, April 26, 2017

Wonders of Wallpaper!

Let's talk about important things: wallpaper.  Loooove me some wallpaper.  We're not talking about your grandma's wallpaper, featuring the primitive lady washing her clothes on the washboard down by the stream (just me?).  Wallpaper today is colorful and vibrant and F-U-N, fun!  


One awesome thing about wallpaper is that it's a great statement maker.  It can really make a room by stealing the spotlight in a good way.  As in a, "Oh, hello, don't mind me.  Just sitting here on your walls being fabulous." kind of way.  Wallpaper is a commitment, but if you find the right one, I think you'll find that the two of you are very happy together.  There is even some less permanent peel and stick wallpaper now, that might help if you have commitment issues hesitations.


I especially love wallpaper in a small space.  It makes the room feel so special.  Like a little jewel box.  We put wallpaper in our powder room downstairs a few years ago and I still love the way this peeks out of the room into the family room.  It turns an ordinary, purely functional room into a design showstopper.


I also love wallpaper on a large scale as a feature wall.   Our mudroom addition off the back features a 20 foot wall two stories high, which lets in awesome light.  However, it was a lot of white wall.  So I knew that if I wallpapered this wall in a fun wallpaper it would bring warmth and an unexpected surprise to the room.  Since the room is in the back of the house, and not easily viewable from everywhere, I knew I could be a little more bold in here.  But when I calculated the cost of wallpaper to cover a 20 foot wall, I had a hard time biting the bullet for a rarely seen mudroom in the back of the house. Buzz kill.


I started looking into other options and a friend of mine told me about a stencil.  Now, when I was a kid growing up, I had a stencil border of hearts and flowers in my room (it was AWESOME, by the way) but just as wallpaper has evolved, (thank you wallpaper Jesus),  so have stencils.   And low and behold we found a stencil in almost the exact same pattern as the wallpaper I was debating not sending my kids to college to afford!


Now, since the walls were in fact so tall,  we did have to hire someone to come in with scaffolding and paint the stencil for us.  It looked to be a tedious job, but she did a great job and when people see it they always compliment our "wallpaper".  In fact, you have to get really close and run your hand along the wall to tell that it is actually a stencil.  The best part? We spent about a third of what we would have spent on the wallpaper.


So, the lesson here today is: yay wallpaper!  Go for it!  But if your piggy bank won't allow for the wallpaper that you want, try for the stencil!


And speaking of stencils, here's an example of a custom stencil we did in my daughter's room.  It might be an upgrade from the hearts and flowers of my youth.


Where have you wallpapered?  Anyone have an awesome stencil story?  I can't wait to hear!  Thanks for reading, friends!

Some favorite wallpaper brands:
Thibaut
Abnormals Anonymous
Schumacher

A great stencil sight:
Cutting Edge Stencils

And if you're local, I have the name of a good stencil applicator.  Let me know!

Wednesday, April 19, 2017

5 Tips for Styling Shelves

Styling shelves is one of the things I am asked most often to help with.  And I get it- they can be daunting.  What do I put on them?  Do I have too much?  Too little?  Big open shelves can be hard to style.  Often times we get stuck or in a rut.  So I decided to give a few basic tips on styling shelves that will hopefully help.


1. Start with the Big Stuff
First, gather and group everything that you think you want to put on the shelves. Then,  an easy place to start styling, is with the biggest pieces that take up the most shelf space.  Start by placing these on the shelves, that way you have a better idea of the space you have left.


2. Create Balance
Look at your shelves as an entire unit, not just shelf by shelf.  If you have a large picture frame at the top shelf, you don't want another large object right underneath it.  It will start to feel heavy and lopsided.  Instead, you want to create balance on the shelves.  For example, if you have a stack of books on the first shelf on the right, maybe on the third shelf stack some additional books on the left.  Or, place an object of similar size on the left as you did on the diagonal above.  Creating balance on your shelves is pleasing to the eye and helps to make them feel like each shelf is related to the others, which helps make the shelves on a whole seem cohesive.


3. Layer
Consider the depth of your shelves and use it to your advantage.  Place some items at the back of the shelves and some more near the front.  Don't be afraid to overlap.  You don't need to see every single inch of every single piece to get the visual benefit.  This creates a really nice layering effect that gives a lot of interest and feels very thought out.


4. Add Unexpected Pieces
Adding an unexpected surprise to the shelving, is a little added bonus.  It helps make the shelves personal and uniquely your own.  Mixing up the textures, and the materials that you place on the shelves makes them feel collected over time.  Despite their name, bookshelves are for more than just books.

5. Edit
Stand back and look at the finished product.  Take things off that feel too heavy or that aren't working in the space.  Move things around to try them in different spots on the shelves. You also don't have to have every inch of the shelf filled.  Open space helps make the shelves feel less crowded and more like a collection than just a place for stuff.   Try not to have the "but that goes in the dining room" mentality.  Being flexible and creative in the ways the items are presented is key.  Sometimes something that has lived in another room for years, even, is just the perfect thing to finish off your shelves.  Plus, the next time someone accuses you of being inflexible you can say, "I'm TOTALLY flexible! Just last week I moved that vase from its place in the family room, to the living room!"


I hope that you benefit from these basic shelf styling tips.  Remember, you can always change them, add to them, take something away,  or redo them all together.  Be creative, and have fun displaying your favorite things.

Thanks for reading, friends!  I hope you're having a great week!

Thursday, April 13, 2017

Bunnies and Chicks and Eggs, Oh My!

Did you check out this fun little Easter craft from the other day?  We are enjoying it on our front porch.   Today I thought I'd share a few more Easter decor ideas with you.  Mostly, when I think of Easter decor, I think spring.  And when I think spring I think renewal and rebirth and flowers and greenery.  It's about opening your windows and letting in the light and the air, right?  In the spring, I like to try and do the same thing with my decor.  Air things out a little bit.  Get rid of the heavy and lighten things up.  And specifically for Easter, a bunny or two never hurt anyone.  

In my house, I have three little kiddos.  So I do like to do a little Easter banner, and I set a few eggs out.  But if that isn't your ideal decor idea, even just setting out a big bunch of tulips gets the job done. 


I love the tassels on this banner from Target.

Anything green and living is great for Spring decor.


Here is our Easter tree with the glass eggs.  I also added my three little bunnies- my kids like to guess which one is represents each of them.  


 I added a few eggs to these lanterns for a subtle Easter nod. They'll be easy to take out after Sunday and the mantle will be back to spring.


 Just a few simple ways to spring a little bunny bounce into your decor and have your home Easter ready! I hope you have a lovely holiday with your families!  Thanks for reading!


Tuesday, April 11, 2017

Trimming the Easter Tree

Last week I kicked off Easter by sharing our Easter table all set for dinner.  Toady I am back to with a fun Easter craft for you to try!


When my friends Sarah and Mika showed me these adorable little Easter egg trees they made with their families, I knew I wanted to share it with you!

For years, as part of our Easter decor, I have been hanging glass eggs on some twigs in a vase and setting them on the buffet in our dining room.  This reminded me of that family favorite, but was a way to incorporate the eggs we dye each year as a family.

What I love specifically about this tree, is that it can include ever member of the household, and unlike the hard boiled eggs,  these decorated eggs don't need to be refridgerated and instead can stay out for the season to show off their pretty colors.

Now.  I'm not a crafter.  Mika and Sarah are both teachers and they are wonderfully patient and creative.  Those are not my strongest suits.  But, I still wanted to give it a whirl and I'm telling you, if I can do this, you can do this.  (We don't need to mention that I had to go back to them and their very specific instructions several times.)

And I did it.  And then I wrote down step by step instructions on what you need and how you do it, for those of us that don't hold crafting at the top of our resume. It's really not hard at all.  I promise.  Here goes.

What you need:
1. Regular, uncooked, out-of-your-fridge eggs (I like to dye white eggs because brown eggs don't take dye as well.)
2. A drill with a long skinny drill bit on the end
3. Fishing line
4. Toothpicks
5. Egg dye


What you do:

Step one:
Take your eggs and drill a small hole in both ends of the egg.  The egg carton supports the egg nicely while you drill. You will need to put a little pressure on the drill, but be careful not to put too much pressure or push the drill speed too high, or you'll have scrambled eggs.  You just want a little pressure on the egg so the drill bit goes in and you just want to drill the hole slowly.  By about egg number 3 this is easy peasy.


Step two:
This is where things get weird.  You have to blow out the whites and the yolks.  Yes, with your mouth.  I know, but just stick with me- it's not as gross as it sounds.  Put your mouth over one of the holes you drilled and blow the eggs into a bowl.   I'll use my eggs to make a quiche for an Easter brunch.

Step three:
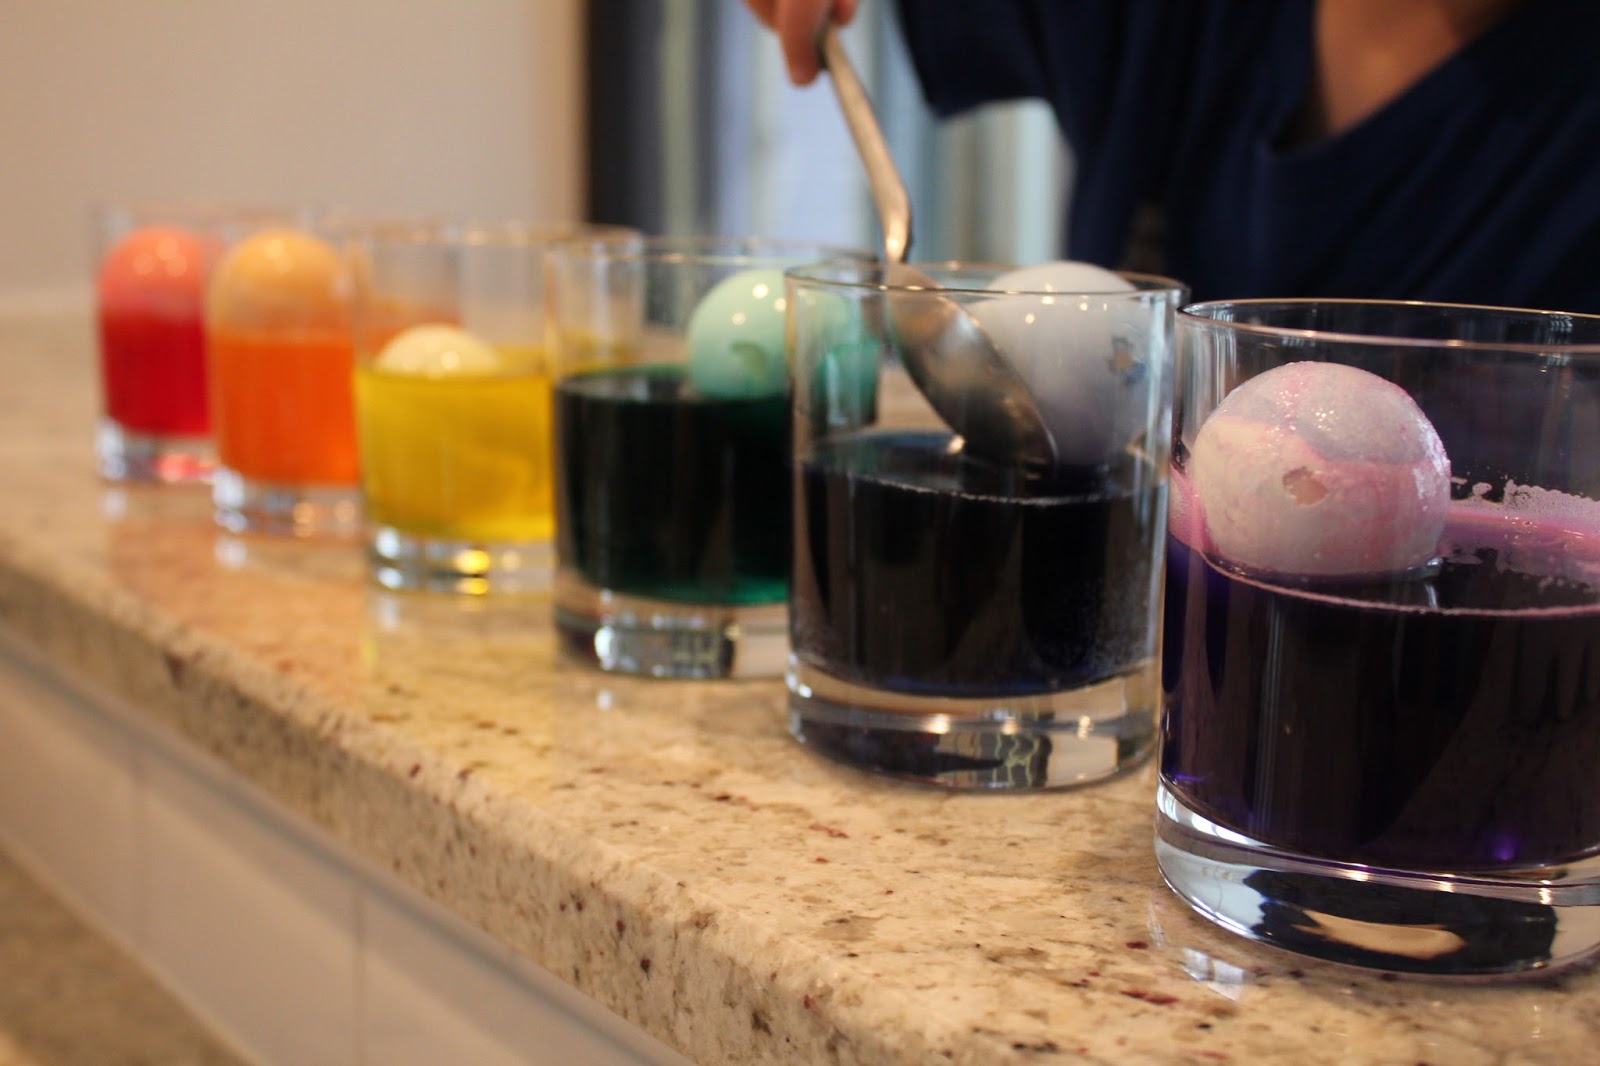
Dye the eggs using your favorite egg dye kit.  Just as you would dye hard boiled eggs.  Some of ours tended to float on the top a bit since they are hollow, so luckily, I had an egg dying assistant who was happy to keep turning them.  After you dye the eggs, set them aside and allow them to dry.


Step four:
While the eggs are drying, hunt for sticks in the yard.  We clipped a few from our forsythia for some added color, and added those with some sticks from the yard.  Pop the sticks in a vase or a jar (Mika uses and old coffee can covered in paper and her kids decorate it with markers and stickers). Fill the jar with a little water (if you have living flowers) and a few rocks for weight.  If you are short on sticks in your yard, you could shop the grocery for flowering branches or, go to your craft store and use artificial branches as well.


Step five:
Take a deep breath and put your patient pants on.  Then take the fishing line and tie it securely around the toothpick.  High five your family when this part is done.  It's oddly the worst part and yes, has nothing to do with the eggs.  (My husband did tell me after the fact, that if you use thinner fishing line, it's a lot easier to work with.) My toothpicks were strangely oversized, so I had to clip the end of them a bit.

Step six:
Thread the toothpick into the egg, keeping the fishing line out.  The toothpick keeps the fishing line in the egg so they can be hung. After the fishing line is secure, tie the opposite end of the line together, for hanging.


Step seven:
Hang the eggs on the tree.  Happy Easter!


 Looks pretty in almost any room in the house!


Think you'll try it?  Post a picture in the comments when you're done!  I can't wait to see how creative you guys will get!  And be sure to check back again this week when I'll be sharing some Easter decor ideas!  (If you're trying to follow me and/or subscribe you have to do that in the regular web version- not from your phone.) And follow me on Instagram @johannampatterson to see the lamb cake I'm making for Easter dinner! Thanks for reading!